The Essential Plumbing System Inspection Guide: How to Inspect Plumbing Systems and DIY Techniques for Aspiring and Experienced Plumbers
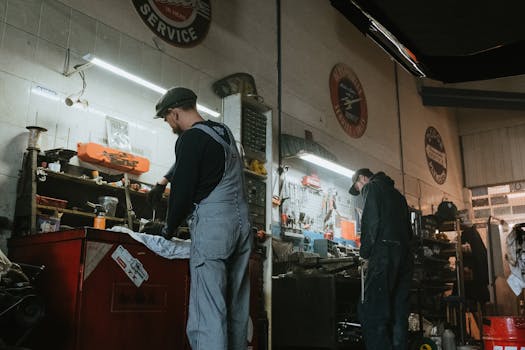
Aspiring plumbers and experienced professionals both face challenges in the plumbing industry. A plumbing system inspection guide helps them understand how to inspect plumbing systems effectively. In this guide, readers learn why regular inspections matter and how they can improve their skills and grow their business. With practical DIY techniques and expert advice, this article is designed to support plumbers at all levels.
Understanding Your Plumbing System Basics
The Foundation of Effective Plumbing Inspections
To master plumbing inspections, you must first understand the plumbing system. A plumbing system transports water, removes waste, and keeps your home or business running smoothly. Key components include supply lines, drainage systems, and fixtures like sinks and toilets.
Key Takeaway: Knowing your plumbing system helps you identify problems early.
Common Plumbing Layouts:
- Residential Systems: Typically consist of smaller pipes and fixtures. The layout often includes a combination of hot and cold water supply lines, drainage systems, and venting.
- Commercial Systems: Usually have larger pipes and more complex layouts. These systems often need to support a higher volume of water and waste.
Inspection Checklist for Beginners:
Tools to Have On Hand:
- Adjustable wrench
- Plumber’s tape
- Pipe wrench
- Screwdriver set
- Flashlight
Routine Inspections: Regular checks help catch issues like leaks or clogs early. Think of it like going to the doctor for a checkup—you want to catch any problems before they become serious (and expensive).

Preparing for a Plumbing Inspection
How to Prepare for a Plumbing Inspection Like a Pro
Preparation is key to a successful plumbing inspection. Before you start, ensure you are organized and have everything ready.
Key Takeaway: A well-prepared inspection saves time and helps identify problems more efficiently.
Preparation Steps:
- Gather Necessary Tools and Documents: Make a list of what you will need (refer to the previous section for tools). Documentation may include previous inspection reports or building plans.
- Safety Protocols: Always wear safety gear like gloves and goggles. If you are inspecting an area with potential electrical hazards, ensure that power is turned off.
- Planning and Organization: A clear plan will keep you focused. For example, start from the water supply and work your way to the drainage systems for a comprehensive check.
Example Checklist:
- Tools ready?
- Safety gear on?
- Previous reports at hand?
- Plan of attack laid out?
DIY Plumbing Inspection Techniques and Best Practices
DIY Plumbing Inspection Techniques for Beginners and Pros
Once you are prepared, it’s time to dive into the inspection itself. Follow these practical steps to conduct a thorough check.
Key Takeaway: Knowing how to inspect plumbing systems can prevent costly repairs later.
Step-by-Step Walkthrough:
- Check Supply Lines: Look for leaks or corrosion around pipes. Inspect connections to ensure that they are tight and secure.
- Inspect Fixtures: Examine sinks, toilets, and showers for any signs of leaks. A simple way to check for leaks is to look under the sink for water stains.
- Test Water Pressure: Use a pressure gauge to ensure that the water pressure is within the normal range (typically between 40-60 PSI). Low pressure can indicate a blockage.
- Examine Drainage Systems: Check for slow drains or backups. Use a flashlight to inspect the pipes for buildup or blockages.
Document Your Findings: Keep a record of any issues you find. This will help you prioritize repairs and track recurring problems.
Common Pitfalls to Avoid:
In addition to the steps outlined, many professionals benefit from using DIY plumbing software tools to streamline their inspection process and enhance their efficiency.
- Skipping areas that seem fine. (Trust me, it can come back to haunt you!)
- Forgetting to document findings.
- Neglecting the importance of water pressure tests.

Special Considerations for Older Homes and Commercial Settings
How to Inspect Plumbing Systems in Older Homes and Beyond
Older homes present unique challenges during plumbing inspections. They often have outdated materials and systems that could pose health risks.
Key Takeaway: Special care is needed when inspecting older plumbing systems.
Best Practices for Older Homes:
- Know the Age of the Plumbing: Older homes may have lead pipes, which are a health hazard. Replace them whenever possible.
- Check for Historical Building Codes: Understanding what systems were in place can help in assessing the current state of plumbing.
- Use Updated Techniques: Techniques may differ from modern inspections. Be aware of the materials and methods used during the home’s construction.
Commercial Plumbing Inspection Process: Commercial settings often feature more complex systems. Consider the following:
- Higher Volume Needs: Commercial plumbing must handle more extensive use, requiring larger pipes and multiple fixtures.
- Compliance with Codes: Ensure that all plumbing complies with current building codes, as these can differ significantly from residential codes.

Advanced Tips, Case Studies, and On-the-Job Experiences
Advanced Insights and Real-World Examples of Successful Plumbing Inspections
As you gain experience, you’ll find that advanced techniques can set you apart from the competition.
Key Takeaway: Advanced insights help improve your efficiency and effectiveness.
Case Studies from Experienced Plumbers:
- Case Study 1: A plumber discovered a hidden leak behind a wall during a routine inspection. By using a moisture meter, they identified the source before it caused significant damage.
- Case Study 2: Another plumber implemented a routine water pressure test in a commercial building. They found pressure issues that led to significant savings for the business by preventing equipment damage.
Advanced Inspection Tips:
- Use Technology: Tools like video cameras can inspect pipes without invasive methods.
- Understand Plumbing Codes: Familiarity with local codes can save you time and money during inspections. Knowing what to look for can help you identify issues quickly.
By adopting these advanced techniques, you can provide better service, improve your skills, and grow your plumbing business.
In summary, mastering the plumbing system inspection process is crucial for both aspiring and experienced plumbers. With the right knowledge and tools, you can identify problems before they escalate and ensure your plumbing systems remain in good working order.
FAQs
Q: I’m new to DIY plumbing inspections – what are the essential steps I should follow to spot hidden issues and ensure a thorough review?
A: To conduct a thorough DIY plumbing inspection, start by visually checking for leaks, corrosion, or water stains around pipes, fixtures, and appliances. Next, test water flow and drainage in sinks, tubs, and toilets, and inspect the water heater for signs of rust or sediment buildup. Additionally, ensure that all plumbing complies with local codes and standards.
Q: How can I effectively inspect an older home’s plumbing system, and what unique challenges should I be on the lookout for?
A: To effectively inspect an older home’s plumbing system, focus on checking for outdated materials, signs of leaks, corrosion, and proper venting. Unique challenges may include navigating space constraints, locating hidden pipes, and dealing with non-standard plumbing configurations that may not meet current codes.
Q: What should I know to prepare for and navigate the process of a commercial plumbing inspection, especially if I’m handling it myself for the first time?
A: To prepare for a commercial plumbing inspection, conduct a thorough site inspection to understand the conditions and potential challenges. Familiarize yourself with the relevant plumbing codes and standards, ensure all systems are properly installed and functioning, and prepare necessary documentation, including drawings and specifications, to present to the inspector.
Q: When reviewing a plumbing system, how do I interpret and apply current plumbing codes to make sure everything is up to standard?
A: To interpret and apply current plumbing codes, first obtain the plumbing code that has jurisdiction over your project and review it thoroughly to understand the minimum standards and requirements. As you examine the plans and specifications, ensure that they comply with the relevant code, noting any discrepancies or incomplete details, and use the code as a guide for accurate estimating and installation. Additionally, consider utilizing a plumbing audit maintenance checklist to ensure all aspects of the system are thoroughly reviewed.