Pipe Installation Best Practices: Essential Plumbing Techniques and Guidelines for Aspiring and Experienced Plumbers
Aspiring and experienced plumbers often ask what pipe installation best practices are, how they can improve their skills, and why mastering these techniques is important. This guide explores essential methods that help plumbers deliver quality work and run successful businesses. By focusing on effective pipe installation, you can save time and money while avoiding common challenges. Whether you are just starting or looking to enhance your expertise, this guide offers valuable insights for everyone in the plumbing industry.
Mastering the Fundamentals of Pipe Installation
Key Takeaway: Understanding basic plumbing techniques is essential for quality installations.
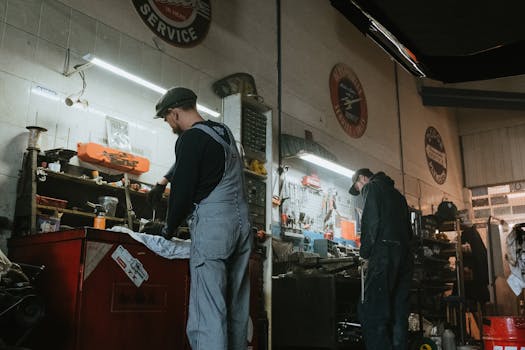
Every plumber, whether new or experienced, must know fundamental plumbing techniques. These techniques form the backbone of any successful pipe installation. They include knowing how to measure accurately, cut correctly, and join pipes effectively. For instance, when using PVC pipes, it is crucial to cut them straight to ensure a tight fit when joining with fittings. An uneven cut can cause leaks and compromise the entire system (and no one wants that!).
Key Material Selection and Preparation
Key Takeaway: Choosing the right materials saves time and money.
Selecting the right pipes and materials is significant for a successful installation. Common materials include PVC, copper, and PEX. Each has its benefits and ideal use cases. For example, PVC is cost-effective and simple to work with, making it great for drainage systems. On the other hand, copper is durable and ideal for water supply lines but can be more expensive.
Cost-Effective Strategies: Aspiring plumbers and small business owners should always compare prices from multiple suppliers. Buying in bulk can also lead to discounts. Additionally, investing in diy plumbing software can save money in the long run by reducing wasted materials and minimizing mistakes.
Pre-Installation Planning
Key Takeaway: Planning prevents costly mistakes.
Before any physical work begins, detailed planning is crucial. This planning includes analyzing the job site and reading blueprints. Understanding the layout helps identify potential obstacles and ensures the installation meets local codes. Checklists can be helpful during this phase. By following a pre-installation checklist, you can ensure that no critical steps are missed, thus avoiding delays and additional costs.

Step-by-Step Guide to Effective Pipe Installation
Key Takeaway: Following a structured process leads to quality installations.
The installation process can be broken down into several key stages: measuring, cutting, joining, and testing. Let’s take a closer look at each stage.
Measuring
Accurate measurements are the first step in any installation. Measure twice, cut once, right? This saying holds true in plumbing. Use a measuring tape to determine the lengths needed for each pipe. Make sure to account for fittings and angles, as these can impact the total length required.
Cutting
Once measurements are complete, it’s time to cut the pipes. Use the appropriate tool for the type of pipe. A pipe cutter is ideal for copper, while a saw works well for PVC. Ensure that cuts are straight to facilitate proper connections.
Joining
Joining pipes is where the magic happens. Follow the manufacturer’s guidelines for the specific type of pipe you are using. For PVC, apply primer and glue to the pipe ends before pushing them together. For copper, soldering is the common method. Always remember to clean the ends of the pipes before joining, as debris can lead to poor connections.
Testing
After installation, testing the system is crucial. For water lines, turn on the water and check for leaks. For drainage systems, run water through to ensure proper flow. Testing helps catch any errors early, saving time and money later.
Cost-Saving Plumbing Solutions: Consider reusing materials when possible. For instance, if you have leftover fittings from a previous job, they could save you from purchasing new ones.
Case Study: A plumber recently completed a residential project that involved installing new drainage pipes in an older home. By carefully measuring and reusing some existing fittings, they reduced material costs by 20%. This approach also minimized waste, which delighted the homeowner.
Prioritizing Safety and Efficiency on the Job
Key Takeaway: Safety measures and efficiency techniques are vital for successful plumbing work.
Safety should always be a priority on the job site. Implementing plumbing safety measures ensures that everyone goes home safe at the end of the day.
Plumbing Safety Measures
Key Takeaway: Always prioritize safety to prevent accidents.
Always wear appropriate gear, such as gloves and goggles. Identify hazards on the job site, like slippery surfaces or exposed wiring. If working with heavy materials, use proper lifting techniques to avoid injury. Additionally, keep your work area clean to prevent accidents.
Efficiency Techniques for Time and Labor Management
Key Takeaway: Streamlining processes saves time and improves profitability.
Efficient plumbing work leads to satisfied clients and repeat business. One way to increase efficiency is by organizing your tools and materials before starting a job. This organization saves time spent searching for items.
Another strategy is to schedule work in blocks. For example, plan all cutting tasks in one session, followed by all joining tasks. This method minimizes downtime and keeps the workflow smooth.

Actionable Tips/Examples
Key Takeaway: Use checklists to enhance safety and efficiency.
Creating a checklist for safety protocols can ensure that nothing is overlooked. Here’s a sample checklist:
Personal Protective Equipment (PPE):
- Gloves
- Goggles
- Hard hat (if necessary)
Site Safety:
- Clear pathways
- Mark hazards
- Secure tools and materials
Efficiency Measures:
- Organize tools
- Schedule tasks
- Review plans and blueprints
Exploring Advanced Techniques for Modern Plumbing
Key Takeaway: Embracing advanced methods can lead to superior outcomes.
As the plumbing industry evolves, so do the techniques available to plumbers. Staying informed about advanced methods can provide a competitive edge.
Embracing Trenchless Pipe Installation
Key Takeaway: Trenchless methods minimize disruption.
Trenchless pipe installation is an innovative technique that allows for pipe replacement or installation without extensive digging. This method minimizes disruption to the surrounding area, making it ideal for urban settings or properties with landscaping. Not only does it save time, but it can also reduce overall project costs.
Enhancing Performance with Pipe Insulation
Key Takeaway: Proper insulation prevents heat loss.
Pipe insulation is essential for maintaining efficiency in plumbing systems. Insulating hot water pipes helps retain heat, reducing energy costs. For cold water pipes, insulation prevents condensation and freezing during colder months. This simple step can lead to significant long-term savings for homeowners. For more detailed insights, refer to our essential plumbing inspection guide.
Examples of Advanced Techniques: A plumbing company recently completed a project using trenchless technology to replace old sewer lines. They saved the homeowner from extensive yard disruption and completed the project ahead of schedule, leading to high customer satisfaction.

By mastering these pipe installation best practices, both aspiring and experienced plumbers can enhance their skills, improve job quality, and grow their businesses. Each aspect, from fundamental techniques to advanced methods, contributes to a successful plumbing career.
FAQs
Q: How can I ensure my pipes are properly supported and aligned to prevent future issues?
A: To ensure your pipes are properly supported and aligned, use appropriate pipe supports such as clevis hangers or trapeze hangers, ensuring they are installed at the correct intervals. Additionally, maintain proper slopes for drainage and provide sleeves for pipes passing through walls or floors to prevent strain and allow for expansion and contraction.
Q: What strategies should I use to account for thermal expansion and contraction during installation?
A: To account for thermal expansion and contraction during installation, provide approved swing joints at mains and branch runouts to allow for movement, and ensure piping has complete freedom of movement except at anchor points. Additionally, use anchors and expansion bends as indicated or required to accommodate these movements without causing stress or strain in the pipe or building structure.
Q: How do I choose the most reliable installation techniques to minimize leaks and maintenance challenges?
A: To choose the most reliable installation techniques that minimize leaks and maintenance challenges, ensure that piping is installed according to the manufacturer’s instructions, use full-length pipes whenever possible, and make tight joints without caulking or using lead. Additionally, incorporate proper bracing and anchors to allow for expansion and contraction, and conduct thorough cleaning of piping before and after installation to remove any foreign materials.
Q: What are some common pitfalls I should watch out for when selecting and connecting different pipe materials?
A: When selecting and connecting different pipe materials, be cautious of compatibility issues, such as using dissimilar metals that can cause galvanic corrosion, and ensure proper joining methods are used for each material to prevent leaks. Additionally, pay attention to temperature and pressure ratings to avoid material failure.